
The interior decoration and furnishings industry has boomed in recent years. Tile floors can increase the beauty and elegance of any room. There are many benefits to choosing tile floors. It gives a special look for the home and its more durable than woods. It comes in different sizes and shapes with a variety of colors. Tile floors can be customized to match any decor. Unfortunately, the cost of installing tile floors can be high. In particular, the flooring industry has made technological breakthroughs with a huge variety of flooring options now available.
Traditional Method:
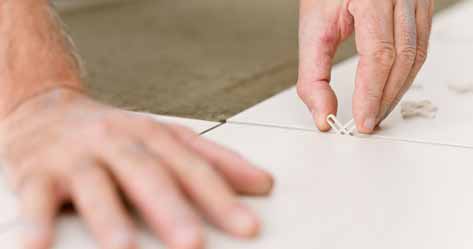
Traditional tile installation requires many tools and it should be pre-set on the floor, cut down to size, and then adhered to the floor using strong industrial glue. They will not stick to every surface. Hence, a layer of floor base must be installed before the tiling work can begin. If the tiles are placed too close together, they can buckle, leaving unsightly bumps and lumps on the floor. While fixing the tiles if they are placed too far apart, there will be obvious gaps. If a mistake is made when laying down the tile, it is very difficult to fix as the tile is glued to the floor. The tile will have to be pried up, excess adhesive scraped, and the process has to be started over again. Laying traditional tile floors is a project that can take several days, to several weeks, to finish. The tile is placed on the sticky surface and is tapped to ensure it is firmly embedded. The sticky surface is the surface that is covered with cement adhesive to make it sticky. Once the tile is fixed, it is wiped to ensure any adhesive that has come up through the edges does not dry up on the tile itself.
Injection Method:
When the tile is damaged and if we want to replace it, then the injection method is the best one. This method involves using a flexible adhesive that is pushed under the tiles using pressure. Because the tiles are being repaired using pressurize adhesive, the user will get a much better adhesion of the tile to the substrate. While using this method, there is no need to remove the tiles. In bathrooms or kitchens where the tiles have been placed, we do not have to remove the fixtures and we do not have to worry about the risk of damaging other surfaces while doing the repairs.
Floor Tiling:
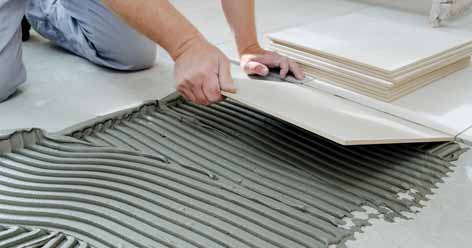
The floor tile is set very much the same way as wall tile. The surface must first be in good condition, firm, perfectly smooth, and free from moisture and foreign matter. Sheets of the tile are pressed into the adhesive spread on the floor, with the papered side uppermost. Let the tile set an hour. One should wet the paper slightly with a damp sponge and pull it off the tile. At this time, the adhesive will still be pliant so that we can re-align individual tiles if necessary. The floor should be allowed to set for a day before grouting. The grout mixture should consist of one part waterproof Portland cement and one part finely screened sand. A minimum amount of water should be used in mixing – just enough for workability. Spread this mixture over the floor and work it into the joints with a squeegee. Joints should be filled and the excess mortar should be removed before it begins to harden. The floor must now be cured and should be covered and kept all traffic off it for about three days. For more details refer https://www.alpha-tiles.com.my/.