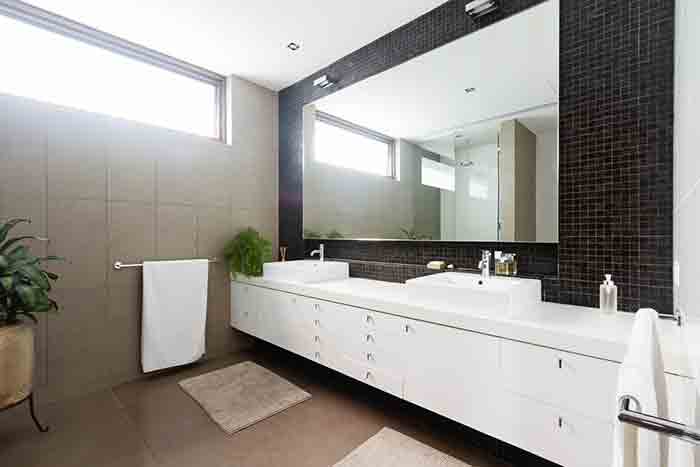
Mirrors can be a great addition to any home. Mirrors are a fantastic way to make your space feel bigger and brighter. They not only provide you with a chance to admire your reflection, but they also serve as an attractive decoration. They also help bring light into dark corners that may otherwise be hard to reach.
However, before you go out and spend money on the perfect mirror for your space, there are some things to keep in mind when mounting it on the wall. There’s no better feeling than walking into a room and seeing your reflection looking back at you, which is why we suggest adding this easy DIY project to your list of things to do ASAP!
Tools Needed For This Project

To complete this project, you will need:
- A hammer,
- Nails,
- A mirror,
- Measuring tape,
- Molding,
- A drill bit
Steps to Putting Mirrors on Walls
Mirrors can be great additions to any room, but finding a good place for them in your home can be difficult. One option is to hang a mirror on a wall. This isn’t always easy, though.
When it comes to putting mirrors on walls, you need just a few basic tools. Then you have to follow these steps:
Step 01: Measure
Choose the location of your mirror, and measure the size. Then cut two pieces of molding to surround your frame with a miter or hand saw if necessary.
Step 02: Mark Holes for Nails
To get a perfect fit, use the right size drill bit and make sure it’s at least (¼) inch wide. Make your first hole on one end of molding then move towards where you want second slot before making another smaller version for final step in this process, find more info.
Step 03: Hammer in Nails
With the nails in place, it’s time to add the mirror itself. Hold the mirror against the wall and nail it into place. You can also use silicone adhesive if you prefer.
Step 04: Clean Up
Once your mirror is up, take a step back and admire your work! If you have any leftover molding or nails, feel free to clean them up now.
That’s all there is to it! Mounting a mirror on the wall is an easy project that can be completed in just a few minutes.
Putting Mirrors on Walls without Nails

Traditionally hanging a mirror means you have to find a reliable surface, mark it with a level tool, and nail or screw holes in it so you can attach the hardware needed for hanging the mirror securely.
There’s also the risk of damaging your walls by using nails or screws that are too long. Plus, if you’re using drywall anchors inside your walls, you’ll need to drill into them, which requires drilling into the wall itself and then making an even bigger hole to fill with plaster or spackle.
All of this can be a lot of work, especially if you’re not handy, click here for more info. Plus, it’s easy to make a mistake and end up with an uneven mirror or one that’s not securely attached to the wall.
Luckily, there’s a much easier way to hang mirrors without nails or screws. You can use mirror hanging adhesive, which is a two-part epoxy that you apply to the back of your mirror. This adhesive will securely attach your mirror to the wall without any damage to your walls.
- To use mirror hanging adhesive, you’ll need to follow these simple steps:
- Choose the location for your mirror and measure the height and width of the frame.
- Cut two pieces of molding to size with a miter saw or hand saw if necessary.
- Make holes in each end of the molding using a drill bit that matches your nail bit size (1/8 inch).
- Apply mirror hanging adhesive to the back of your mirror.
- Attach the molding to the wall using nails or screws, making sure that the holes you drilled are in line with the mirror hanging adhesive.
- Hang your mirror on the hooks or screws that are attached to the molding.
You may also be able to find pre-made adhesive clips specially made for hanging mirrors without nails or screws.
These are one of the most popular ways for hanging wall mirrors, according to DIY. These clips are usually attached with nails or screws, but make sure that they won’t show when you’re finished.
Mirror Installation Safety Precautions

When installing a mirror on the wall, there are some safety precautions you should keep in mind.
- Always measure the space to make sure the mirror will fit.
- If you’re using a hammer and nails to install the mirror, be careful not to hit your fingers.
- It’s also important to use a drill bit that’s the same size as your nail bit to make holes in the molding, so the nails will fit securely.
- When drilling holes, make sure you use a power drill, and never go too deep.
- Wear safety goggles when using power tools, and always let others know when you are in the process of drilling holes.
- Don’t hammer the nails directly in the center of the molding so you won’t hit backer boards or framing members when driving them in.
- If you’re not sure if the drill bit is compatible with your nail, it’s best to test it on a scrap of wood.
- Regardless of the size and weight of the mirror, always attach one end of the frame to something solid like a stud or wall anchor. Use a level as well as gravity to make sure it stays put.
Conclusion
Mirrors are a great way to create more space in tight quarters, but they can be difficult to hang. For this reason, we’ve created an easy-to-follow guide on how to mount a mirror on the wall using only basic tools and materials.
We’ve also given detailed instructions for measuring your space and cutting molding as well as mounting it onto the wall with nails. Hopefully those guide ideas will come in handy for your next project.